
So here's the original photo, I was feeling smugly satisfied at how tidy it was looking:

Onwards! Here's how to do a narrow, single thickness (or single-fold) mitred quilt binding:
First, cut your strips. I've cut mine 1 and 1/4 inches. Which makes it a nice flat 1/4 inch on the front. You could try 1 inch for something even narrower if you liked.


Cut enough strips to enclose the circumferance of your quilt with a good overlap of the strips ends by about 5 inches. Join your strips with mitred joins. Open the seams and press flat.

Sew the binding strip to the front your quilt, right side of strip to the front of your quilt. Start (with a couple of backstitches) in the middle of one side of your quilt and leave a free hanging tail on the binding strip of about 5 inches, just like using a traditional double fold binding. I use a slightly narrower than 1/4 inch seam allowance, using the markings on my walking foot to line it up. If you cut your strip less than 1 and 1/4 inches wide, you'll have to sew even narrower.
Stop sewing before you reach the end of the side (see pic above). How far away to stop depends on the width of your seam allowance, if you are sewing with 1/4 inch, then stop 1/4 inch away from the end. If you're sewing a 1/8 inch seam allowance, stop 1/8 inch away. If you don't want to measure, the easiest way to eyeball it is to fold the binding strip up at a 90 degree angle, crease it, unfold it and then stop at the 45 degree crease, backstitch a couple of stitches.

Take your quilt out from under the needle, fold binding strip up at a 90 degree, then fold it back down along the next side to stitch. Like the photo below. This forms your mitred corners when you fold it round to the back, so keep them as neat and precise as you can (no wine, it's too early to celebrate yet!)
Finger press it flat and neat. Then stick it back under the machine.

Start stitching right from the edge and carry on down that edge. In the pic above you can see I'm lining up my quilt edge and my binding strip edge with the inner edge of the inner 'prong' of my walking foot, not using the 1/4 inch marking as that would be too wide.
Once again, stop before you reach the end of that side and repeat the steps above. Rinse and repeat four more times, until you are heading back down the same side you started on.

Stop sewing about 5 inches from where you started and take a few backstitches. Now, if you have a foolproof method of joining binding strips on your usual double fold binding, go for it, it should work for single fold as much as it does for double fold.
If not and you want to learn my no-measure way, pay attention! And maybe zoom in on that pic above 😉
Pinch your strips together like in the pic and use a sharp pin to take a couple threads in each strip, right about where the seam allowance would hit (look at where my thumb is.)

Once you have a couple of threads with the pin joining the strips together, you should be able to bunch the quilt up a bit and twist the strips out sideways so they cross right sides together at an angle. This is why you can only take a couple of threads with the pin, or the strips won't pivot nicely.

Stich the strips where they cross, from the point of the top angle to the bottom point, remove the pin before you hit it, as your stitching line should go right through where it catches the fabric. It might help to use your 1/4 inch foot, not your bulky walking foot to do this.

Once you've sewn the strips together, you should be able to pivot them back against the edge of your quilt. Check that they lie smooth and flat and then trim them (as the pic below) and press the seam open. In the pic below you can see that I have a strip join seam quite close to the end join. Not ideal, if you can cut your strips a little shorter or longer to avoid this it would look better (but I ain't perfect...!)

Sew the last bit of the seam to meet up with where you began, backstitching at the beginning the end.

And here's what it should look like now. All neatly sewn in one continuous strip to the front of your quilt, with mitred corners, all ready to turn to the back.

Press your strip out from the front of your quilt.
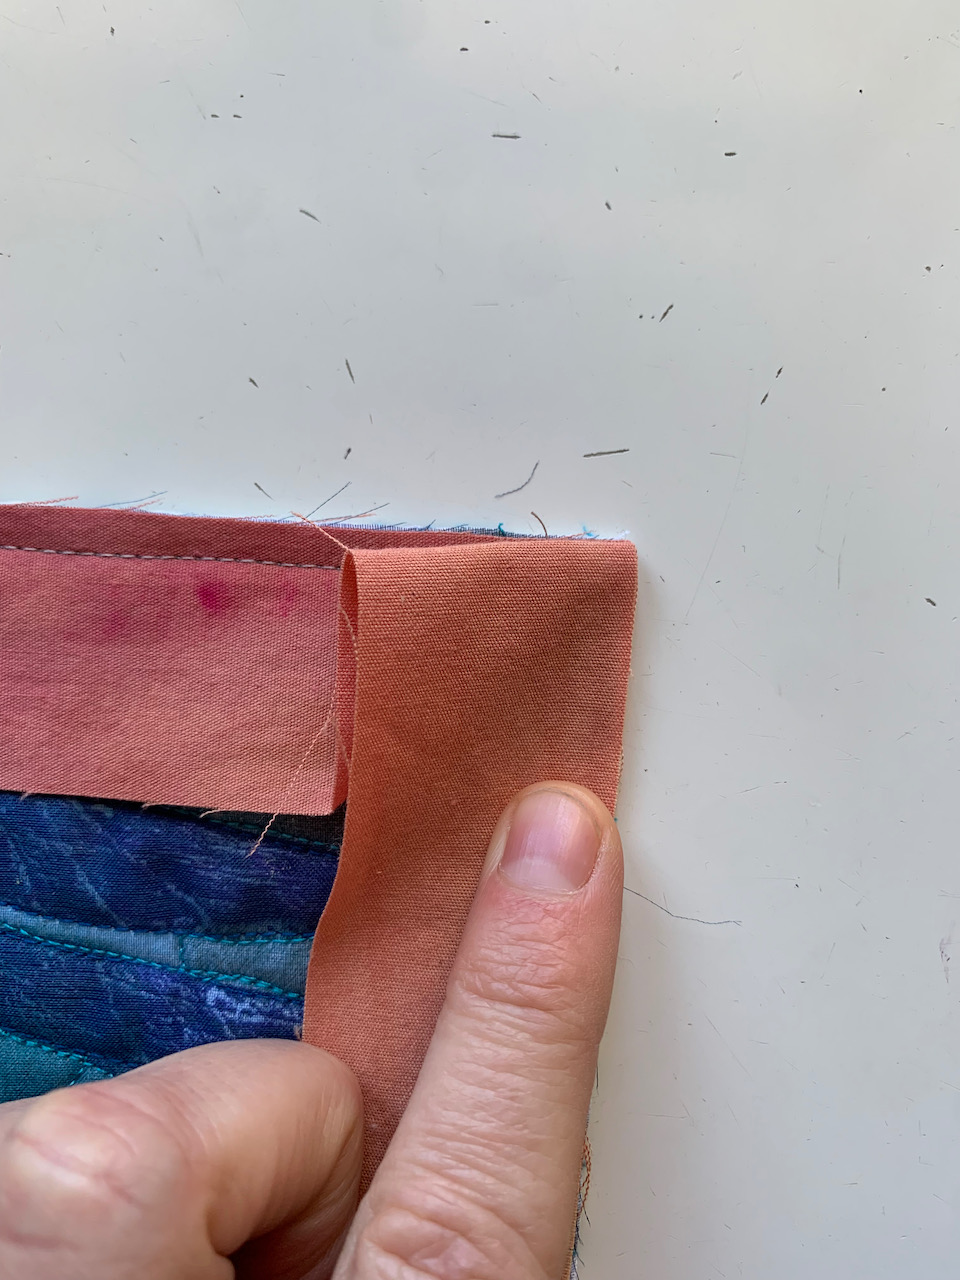
Then flip the quilt over (right side down) and fold the raw edge of the strip in towards the quilt (but not OVER the quilt) and press. You won't really be able to do the corners quite yet.
When you have done the sides, working as close to the corners as you can, slide your finger along the strip towards the corner, folding in the raw edge as you go, and then into the corner. The binding strip will kinda stand up and form around the corner. You will then be able to fold one side over one edge of the quilt, then the other side over the other edge of the quilt and make a nice neat mitred corner, covering the machine stitching lines as you go.
The following sequence of pics show the process ( I really should make a video of this!)
Please don't judge the state of my pressing surface....😝

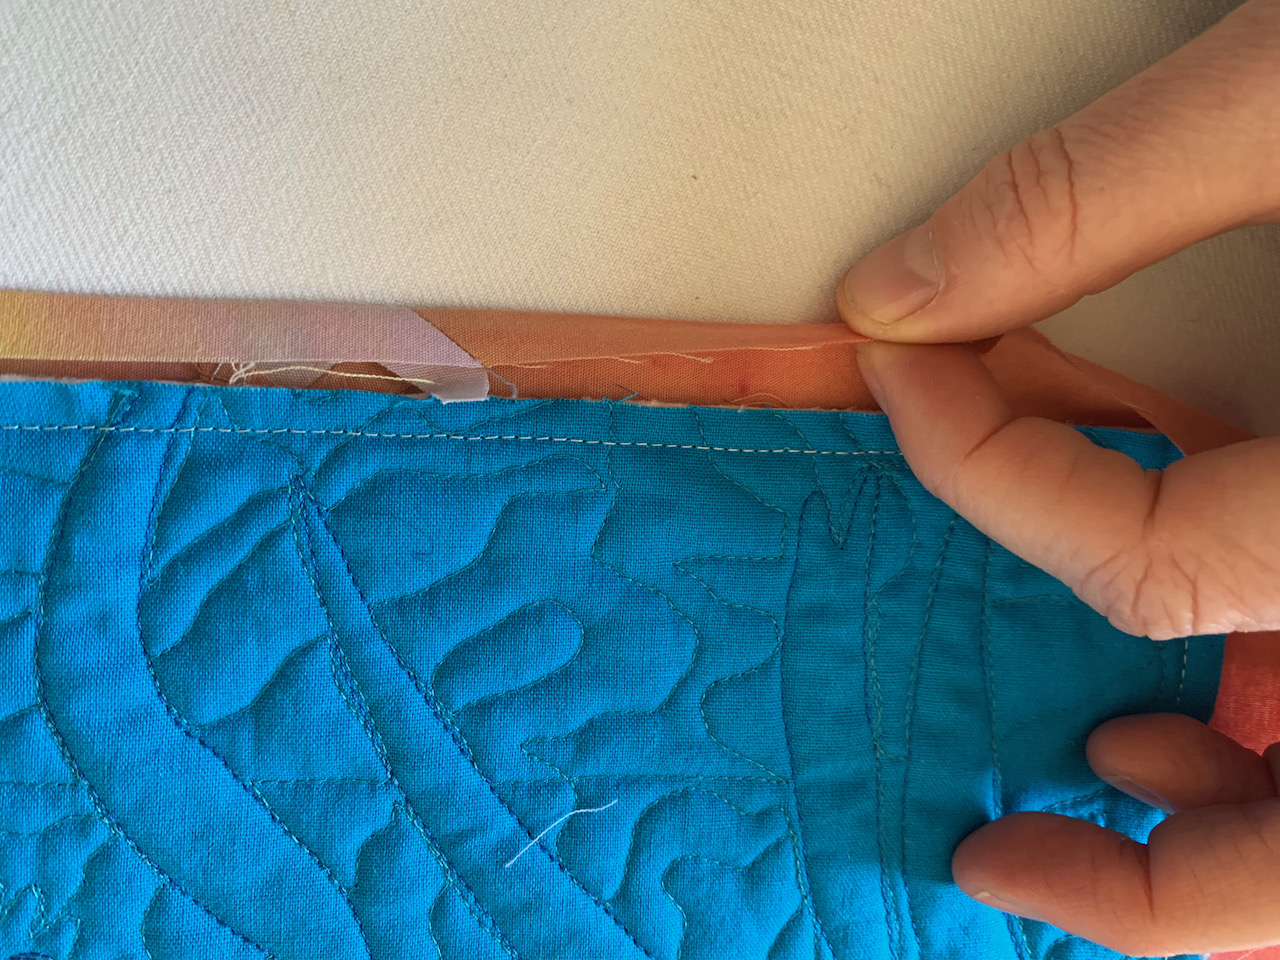
Slide finger along, folding in raw edge as you go towards the corner.

Hit the corner and the binding strip stands up.

Fold one side of the strip over the edge of the quilt, covering the machine stitching lines.

Fold the other side of the strip over the other side of the quilt and form a nice mitre in the corner
And that's it! Now you can press again, pin, and hand-stitch the binding neatly (or messily as you prefer) to the back of your quilt.

Above is with the binding just pinned, not stitched. It lies flatter and neater when the stitching is done.

And here's me hand-stitching it with a hem stitch to the back. I take a couple of stitches at the corners too, just for added neatness and security (and because the quilt police once told me I should.) You can see that it is slightly wider at the back, which means it neatly covers the line of machine sewing from sewing it onto the front.
I hope this makes sense. Please ask any question that you need to for clarification.
Very tidy. Love the little tip about finger pressing the point where your stitching should stop on the corners, this is always a bit of a guess even though I measure 🤔
ReplyDelete