My name is Charlotte, sometimes known as Ms Lottie, occasionally as The Slightly Mad Quilt Lady. This is my blog, where you'll find me writing a lot about my quilting and textile arts and a little about my family's life in a small seaside town in New Zealand. Haere mai!

Friday, March 31, 2017

100 Days Project 2017 - Creative Practice

Last year I took part in the 100 days creative practice challenge.  I found it immensely rewarding.  Frustrating and hard sometimes, but overall I found my art going places I hadn't foreseen and finding ideas I hadn't thought of and possibilities I hadn't discovered.  (You can find my project here.)


So I'm doing it again this year.  It's running earlier, from May till August, which suits me better.  And my daughter is really keen to take part, so I have an accountability partner already!

I learnt a few things last year:

  • Keep it fairly small, broad possibilities are sometimes just as paralysing as narrow ones.
  • Think about a standard format in case you want to present your work as a whole in a 100 days show.
  • Have something new and shiny to work with to motivate you! (Last year mine was a brand new sketch book.)
And I've been thinking a lot about what I want to explore and how.

Last year was 100 days of faces.  I had never felt very comfortable drawing faces or including them in my work.  I'm much more comfortable with them now, but I still don't really include them in my work, so my first idea was to explore adding faces into my quilts.


But that's awfully broad.

So then I started thinking about how I work, what techniques I already use and what techniques I'd like to explore or develop.  100 days of printing was quite appealing.  But it's not very transportable and really does mean that I have to be quite prepared for each day's work.  My life doesn't always run like that...

I've ended up with 100 days of scissors.  A few things lead me to this.  I had been thinking about how I work with a lot of silhouettes in my work and I use scissors constantly.  Then when Matisse and his large paper cut-outs was mentioned on the AQ education seminar that I just went to (more on that later), ideas started to fall into place.  Matisse's 'hand' was very evident in his work, he was sketching with card, using the cut-outs to play with layout and test colour and form.  I do the same with my fabric cut outs, but I'm a lot more 'staid' in my cutting out.  I draw first and cut on the line.  So what will happen if I try and develop my 'hand' by free-hand cutting?  What sort of shapes and forms will appear?  Will you be able to see my voice and style?


So I've been researching Matisse and his gouaches decoupes and I've remembered that I've followed Raymond Saa on Instagram for a while (have I subconsciously been thinking about this longer than I know?) and I found Claire Brewster as inspiration too.  I'm going to keep thinking and researching, but when it gets close to May 22, start day, I'm going to put the books away, stop looking at other's work, and see where my scissors will take me.

My new 100 days project link is here (I think it's working).  I'm charlottewaves (my daughter is oliviawaves, she wanted matching user names and I'm indulging her while she's young enough to still want to be like me).

My shiny new things to add motivation?  A black paged sketchbook, a stack of coloured card and some brand new, very sharp, dedicated to paper, scissors.


Will you be doing the 100 days challenge this year?  And if you are, what's your project going to be?

Edited to add:  Here's the link if you want to sign up http://100daysproject.co.nz click the register button in the top right corner.

Thursday, March 30, 2017

More Fabric Dye Test Results


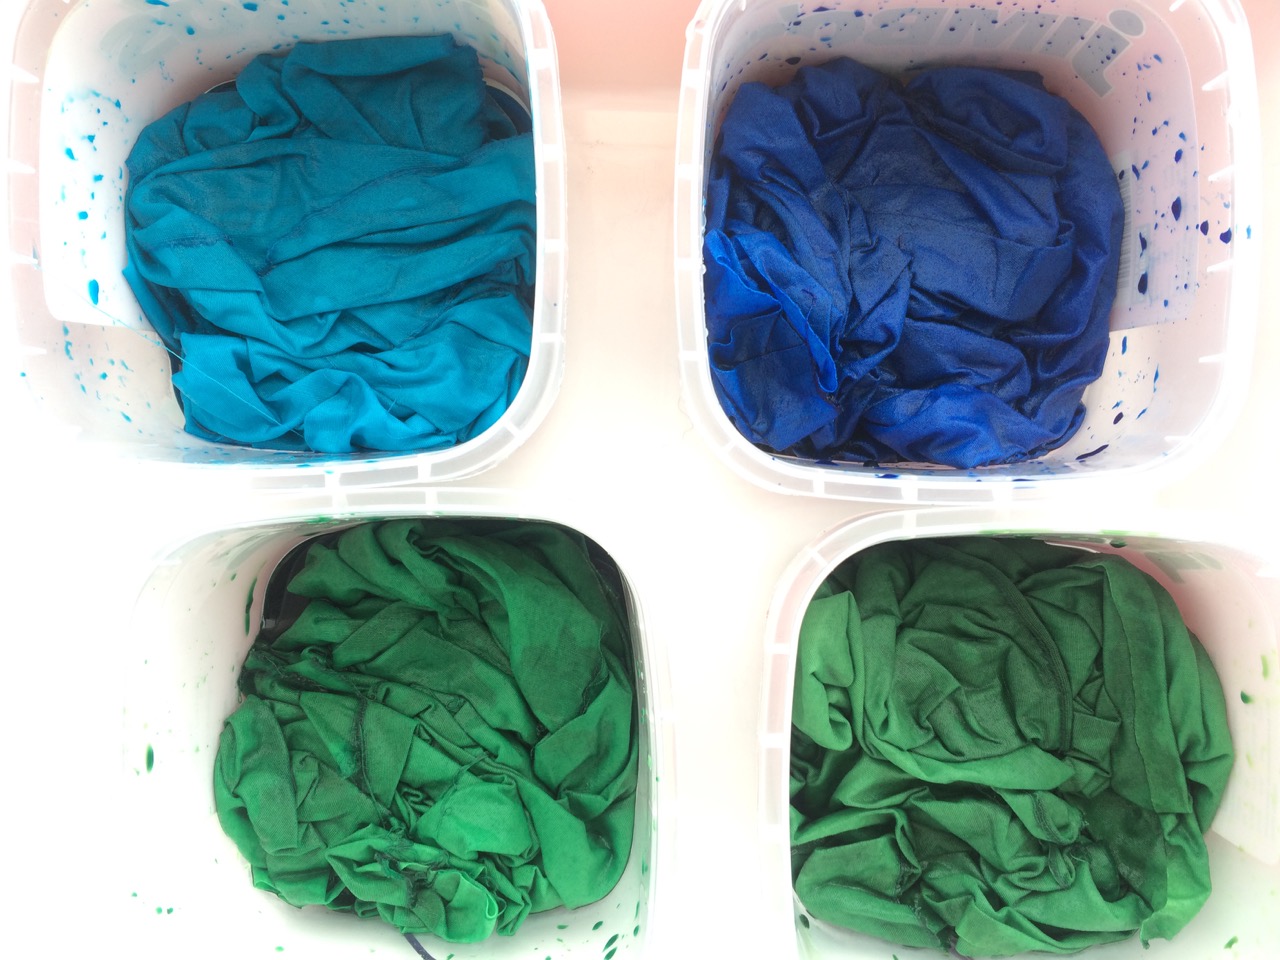
I've been testing more of the old dyes that were donated to me.  In each colour group, the colour of the dye solution when made up is in the top photograph, and the fabric, after it is rinsed and dried, is in the bottom photograph.  In this set, from top left going clockwise, is reddish navy, purple, fuchsia and eggplant.


Not a bad result at all.  And no, I haven't upped the saturation, fuchsia is just so pink that it almost hurts your eyes.


Again, from top left clockwise: golden, orange, rosebud and bright yellow.  The orange has washed out significantly but the rest are pretty good.


Here we have jade green, intense blue, grass green and brightest green.  I don't know who's idea of jade that jade green was, but it's not what I'd call jade.  And intense blue washed out to a nice summer sky blue.  


None of them are as bad as the blue I first trialled.  They all still have enough potency to be usable.  But I've taken snippets of these test fabrics and pasted them in my dye book for record keeping purposes.  I've also taken snippets and glued them onto the tops of the dye powder jars so I'll remember at a glance that some of these are not what they seem from the name.

Tuesday, March 28, 2017

What do do with dyed silk organza?

Just a quick post to follow on from my last post about dyeing silk organza.

So what do you do with silk organza once it's dyed?  You can cut it up and collage it, you can stick a lightweight fusible on the back and cut intricate appliqué shapes from it, you can use it in layers like I did with my 'Early Morning Fishing' quilt.

Or you can use it as a whole piece for an overlay or underlay.  Here's what I'm doing with the piece I dyed for my how-to process photographs:


I've done some flora printing (printing with plant material) onto a white background fabric and then just laid the whole piece of organza over the top.  So far I'm liking where it's heading.

Friday, March 17, 2017

How to dye silk organza. Technique 1

I've been asked for some more information about how I dye my silk organza.  I'm planning to show you several different techniques that I use, one per blog post, so watch for more to come.

Note:  Safety first folks!  Wear your protective gear when you're dyeing and use a dust mask when working with the dye powders.  Use measuring, mixing and dyeing equipment that is reserved only for dyeing and keep food and drink out of the dyeing area.  Use your common sense and you'll be fine.

First, I purchase silk organza in bulk so I can cut off what I need when I want it.  It's not cheap, but it's worth it.

Next, I make up my dye solutions.  I use fibre reactive dyes from Dharma Trading Co and mix 1 tablespoon (that's a spoon that measures 15 liquid millilitres in NZ) per 2 cups of water (500 millilitres in NZ).  I know people weigh their dye powders to be more precise and get percentage solutions, but that's a bit too exacting for me).  I leave these dye solution concentrates in my studio fridge and then I can mix these together, dilute them or whatever I want to do, whenever I want.


Piggyback serendipity is what I sometimes call the technique that I'll show you today.  I often have some bits of organza already cut and just grab one when I'm dyeing my cotton fabric and do the same treatment on it.  So it's piggybacking off what I'm doing with the cotton fabric.

You'll always find a bucket of soda ash solution in a corner of my studio.  I like to leave my cotton fabrics soaking in there for at least 24 hours before I dye them.  I think it helps with 'opening' up the cotton fibres to accept the dye.  And of course, soda ash is needed as part of the chemical reaction with the fibre reactive dyes that I use.

But I don't leave my silk to soak.  Silk prefers acid rather than base solutions to preserve it's lustre, so I keep the exposure to soda ash to a minimum.  I just dunk it in the soda ash bucket and squeeze it through.


Today I was planning to do a tray dye on a metre piece of cotton.  So I accordion folded up my organza before I put it in the soda ash.  It's hard to handle and fold when it's wet, so unless you like wet silk organza sticking up all over your arms, try and fold it dry.


I fold and scrunch it into different shapes depending what I'm planning.  An accordion fold means that the colours will repeat across the length.  Then I scrunched it to fit into the tray.  If you wanted water ripples, you could pleat it up more regularly.  Or you could scrunch one area and have another area lying completely flat.  Experiment, it's part of the fun!


My cotton fabric goes on top folded into whatever shape I want and then I pour my dye solutions over.  Today I used some yellow and red to make orange, added some water to dilute then added a bit of navy for brown.  I'd pour on a bit and then add some more dye to alter the colour a bit but keep it related to the first colours.  I added turquoise, then some navy and then some more yellow and a bit of water here and there.  Now you can see where the serendipity bit of the name come from.


Press it all down so you know it's squeezed through then leave in a relatively warm place for at least four hours, and overnight if possible.


Rinse it all under cold running water until the water runs fairly clear.  I then soak the fabrics in warm water, changing the soaks every now and then, usually leaving it overnight at some point, until all the excess dye is gone.  Then separate the silk from the cotton, wash the cotton in your washing machine on hot and hand wash the silk with warm water.


Dry, press and use in whatever way you wish!  Above you can see the two finished pieces from this particular dyeing session.  Organza on the left and cotton on the right.  Silk picks up the dye very well so the colours look a little deeper on the organza, but remember you are seeing it double thickness and with a green backdrop (thanks to the recent rains for greening everything up!)

And look how that cross shape comes through the organza....now there's a little piece of inspiration....

Sunday, March 12, 2017

Podcast Interview with Helen Jones - NZ Modern Quilt Guild


Helen Jones is the founder of the new chapter of the Modern Quilt Guild (MQG) right here in New Zealand.  Back in November 2016, Helen asked for expressions of interest and was so pleased with the results that she went ahead with her plan and began taking official memberships in February.  (Follow the links listed at the end of this post if you'd like to sign up)

http://nzmqg.org

Because of NZ's small population and geographical spread, Helen intends to make the most of technology to grow the community.  They've started by holding virtual sew-ins to grow friendships and Helen has block of the month tutorials, membership swaps and lots of other great activities planned.

Helen's latest work in progress.
We discuss what modern quilting is, what makes a modern quilter and the exciting line-up of modern quilt teachers at this year's NZ Quilt Symposium.  I learn who Helen's partners in crime are (thanks Anna and Melissa!), what she thought of this year's QuiltCon show and what Helen's can't-live-without tools are.

Helen uses a Knight Agile electric desk, which she can lower to sew at and raise to cut on, all with the touch of a button:


And she loves her clever Zirkel magnetic pincushion (you should watch this video of it!).


Thanks for chatting to me Helen!

You can find more info through all the links listed, listen to the interview directly in the audio player below, or subscribe to the podcast through iTunes or any other podcast listening site.

PS If you enjoyed the show, tell a friend about it!

Instagram links:
NZMQG https://www.instagram.com/nzmqg/
Helen https://www.instagram.com/meandmyquilting/
Anna https://www.instagram.com/hix_girl/
Melissa https://www.instagram.com/honeythorpe/

Websites:
NZMQG http://nzmqg.org
The International Modern Quilt Guild http://www.themodernquiltguild.com/content/about-mqg
Helen http://meandmyquilting.com

Email:
info@nzmqg.org


Download this episode (right click and save)