My name is Charlotte, sometimes known as Ms Lottie, occasionally as The Slightly Mad Quilt Lady. This is my blog, where you'll find me writing a lot about my quilting and textile arts and a little about my family's life in a small seaside town in New Zealand. Haere mai!
Showing posts with label tour. Show all posts

Thursday, June 1, 2017

My Pressing Station - Quilt Studio Tour

Following on from showing you my quilt cutting station, I'm going to show off my new pressing station.  I had been using my ironing board in this location, but Suz's comment on my last studio tour post made me think.

"I've still got my main cutting station set up on top of our large chest freezer... stole that idea off you before :o) but I changed the ironing board area, removing the legs and attaching the top onto a shelving unit. Makes it a bit taller, which is more comfortable to use, and I have useful storage space underneath!"

I've always wanted to set up a better pressing station because an ironing board just isn't big enough for big flat pieces of fabric.  And I don't iron clothes, so I don't need the tapering bit of a board.....


So I assessed what furniture I had around, and here's what I came up with.  A small fold up trestle table that we use for camping (not any more!), those big chunks of wood designed for my door table (see the blog post on my cutting station), three layers of cotton batting, a white sheet, a piece of fabric for a cover and I'm good to go!

When I stand at the pressing station there is a large white cupboard to my left - that holds the majority of my fabric stash.  To the right is a passageway to the laundry, bathroom and the only bedroom.

The chunks of wood stick out a bit at the foot and I thought I might catch my feet, but I haven't yet so they are staying that way for now.


They also sit on carpet and, from experience, the natural wood will leave marks.  I don't know whether it's leaching or perhaps dampness from such a large chunk of wood, but either way, I've cut two pieces of plastic drop sheet the same size as the wood and placed them underneath to protect the carpet.

I hide the ugly trestle legs under a white sheet, and I've got storage of a sorts underneath.  I can fit one more of the larger tubs under there too, and until now those tubs were just kicking around making a nuisance of themselves, so it's good to get them out of the way.


You can get a sense of the size by knowing those are fat quarters of my hand-dyed fabrics.  Loving the size!!  All that room feels luxurious.  There is an electrical plug just behind the table at floor height, so no problems with the iron cord.  The trestle table top is made of heavy duty plastic, but I've stuck my hand underneath the three layers of batting after doing a session of pressing and it's warm but not hot, so I'm not worried about nasty, melty, plastic messes.


And on the wall above the pressing station I have a contraption that my Grandfather made.  He was an artist and iron worker in his spare time and I have a couple of chandeliers he made, a door knocker and this thing, which might be made to hang a light off?  Anyway, it's now hanging my teflon and cotton pressing sheets.  Very handy.  


Here's another view.  I'm standing just at the entrance to the passage way to the laundry etc.  To the left of the dryer is a door and then my cutting station is to the left of the door.  The dryer is temporary (remember, the studio also serves as our storage unit).  I do use it occasionally but have to pull it over so the vent sticks out the open door!

That's a small design board above the dryer and then sets of storage shelves in the far corner and end of the room.

I'm super happy with my new pressing station.  Once again, nothing flash, but it gives me a chance to see if I really like the size and height and then maybe one day I'll invest in something a bit more classy!

What do you use as a pressing station?

Tuesday, May 16, 2017

My Quilt Cutting Station

I've been in my new quilting studio for about six months now and I finally feel like I'm getting some order to the chaos.

When I first moved in I immediately set up my Sew-ezi sewing machine table and the two trestles I use and got to work.  Then everything else moved in around me, clutter happened and chaos began.

As we are using it as storage for furniture that can't go on the boat, it filled up pretty quickly and I've been sorting and shifting things around ever since.  The flat has two poles in the main room, which really annoy me effect the possible furniture configurations (see here for photos of the empty studio).

But I think I've finally sorted out a layout that is working.   I can see it staying this way for a little while and today I'm going to show you my cutting station part of the set up.


We don't have Ikea in NZ so there was no melding together several kitset units or anything fancy.  In my art gallery/studio I had a display table made of an old boat door, painted white and laid across two  huge chunky bits of wood.  So I set it up in my new studio as my cutting station, but it was too low.


I had a brainwave (probably from seeing all those cutting stations set up on the top of Ikea drawer units) to use a couple of old sets of drawers that I was already using for notions and paint etc.  It makes it quite tall, almost 98 cm, but a good height for me at 168 cm tall, especially if I wear shoes!  I also slipped another desk unit underneath for extra storage.  That consolidated some of the furniture that was taking up valuable floor space in my studio too, an added bonus.

*Hey Dad?  Recognise that drawer unit?!  It's one you made - was it the old telephone desk when we were kids?*

The table top is slightly wider at one end than the other, which is why I have the end unit below turned around and facing out - it gives the table better support.


I have my cutting mat on top at one end, and it's a really sunny spot (as you can see by the difficult photography), so when I leave I always shut the curtains so I don't get a warped cutting mat or faded fabrics if I leave them out.

I've put some 3M hooks on the other end unit for my most used rulers and my large rotary cutter.


I use the top of the table for holding all the necessary junk that collects when I'm cutting a quilt - patterns and notes, fabrics, pins, pencil case - it can become a bit of a mountain of junk but I cleaned it up specially to take photos!


The chunky bits of wood went outside onto the deck.  They were all natural to begin with so a bit of weathering won't hurt them if I want to use them again.  And I think I'll add some more 3M hooks to the other side of the smaller end unit for a few more rulers, a tape measure and my scissors.  I'm always doing the 'scissor pat', you know - when you pat down the fabric laying all over the table to find your scissors?

Yes, I'd love for it to be bigger.  I'd love to have two cutting mats end to end.  I'd love to have a table that I could adjust the height of with the push of a button.  But until I win Lotto, this is working well.  And heck, it's better than using the dining room table!

What's your cutting station like?

Thursday, May 15, 2014

The boat tour. Welcome aboard!

Warning - this is a picture heavy post. 


 Lots of people are pestering me for more pictures of our new home.  And I am nothing if not obliging!  The picture above is Cerego berthed at the boatyard dock.  That's my husband beside her, so you can get an idea of scale.  She is a wooden boat, built in 1943 for the Australian Navy and was meant to be used as a mine sweeper.  She is 20.1 metres long, which is about 66 feet.  The rust is not from her structural bolts - don't worry!


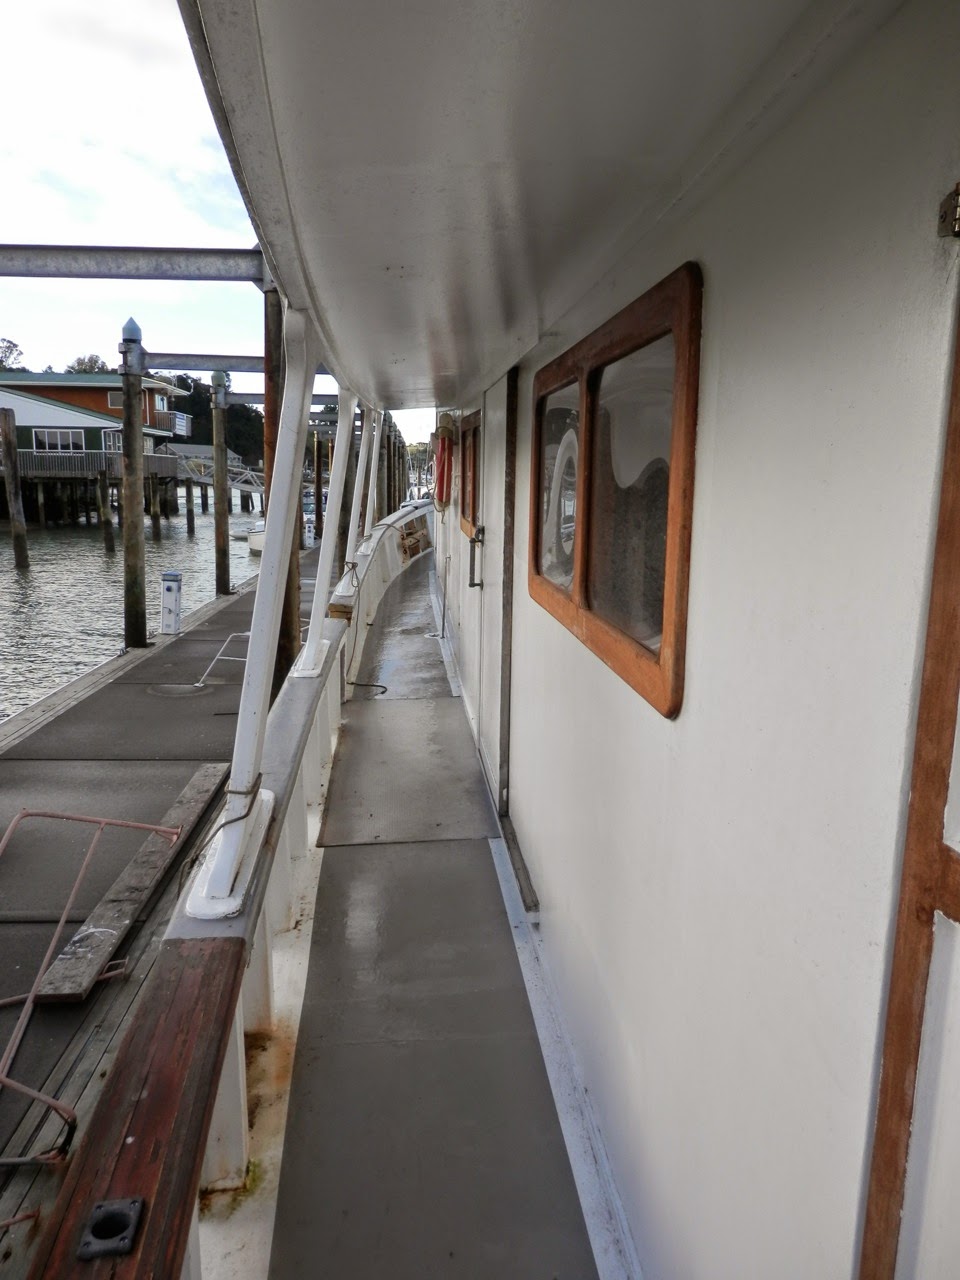
When you climb up the left (port) side you are on this long narrow walkway.  And then you walk around the back (aft - I'm going to be all nautical jargon soon!) and then...


you hit the back deck.  Nothing very exciting here, except a ladder and a hatch.  Ladder leads to top deck, I'll take you up there soon, hatch leads....


down to a storage type locker.  Large, dark and dingy.  It has water storage barrels and other junk in it at present.


When you walk in through the back door, you see the main cabin, which is in the picture above and below.  Above, in the corner with the rubbish bag, is probably where my sewing table will be set up.  You can see the doorway that leads forward to the galley and wheelhouse.


The picture bove is the other end of the same room.  The glass door leads in from the back deck.  The white door is the side door and there is a matching one on the other side.  There is also a matching couch on the other side.  The hatch in the floor is how you get below to.....


the yucky and really rough cabin that will be bunk rooms and play room for the kids.  At the front of this cabin is the door leading to the engine room, you can see that below. 


The areas below decks are where the work really needs to be done.  Panelling and painting and walls and bunks and portholes and light prisms.


So come back up out of the kid's room into the main cabin and walk forward to the galley.  This is the nice part of the boat.  There is a microwave, electric oven, gas hob, decent sized fridge-freezer and, best of all, a good-sized pantry.  The photo below is looking back toward the main cabin.


Carrying on forward toward the wheelhouse, you pass a little narrow (and steep) staircase.


If you head down this staircase (almost a ladder really) you get to the forward cabin.  Another area that needs major work.


This icky looking bunk will go and be rebuilt in a more efficient way.  Lots of painting etc again.


If you turn around, the photo above shows what the back of the cabin looks like - usually without the silly lad making faces!


Above is the wheelhouse.  It all looks 'proper' up here, like what you expect a boat to look like.


What a about a bathroom?  No, we don't have to hose off with saltwater!  Down the other side of the boat (starboard) is a little cupboard cabin.  Internally this sits between the galley and the main cabin.


And inside this little cabin is an almost full sized shower and toilet.  Yay!  If you've ever used a standard boat toilet, you'll know why this is big deal.


Back out onto the back deck, now head up that ladder.


And you reach the top deck.  The photo above is looking back toward the ladder.  This will eventually have a handrail around the sides, and Hubby has plans to put the spa pool up here.....yes, I said spa pool!  We have a little plug in portable one that he thinks we need.  I'm not so sure.


Right at the front of the top deck, you look over and down and you get a grand view of the anchor chains and winch.  You're standing on top of the wheelhouse.

So, I hope you enjoyed the tour.  I'll write more soon about why we are embarking on this adventure.