My name is Charlotte, sometimes known as Ms Lottie, occasionally as The Slightly Mad Quilt Lady. This is my blog, where you'll find me writing a lot about my quilting and textile arts and a little about my family's life in a small seaside town in New Zealand. Haere mai!
Showing posts with label dyeing. Show all posts

Sunday, September 8, 2019

Mud vs. Rainbow - thread dyeing

I promised I’d let you know whether I got mud or pretty colours with my thread dyeing experiment yesterday.


Well, they’ve been soaked (several times), rinsed, washed, dried and wound into skeins, and voila....!


I was honestly surprised that they turned out as well as they did. There are a couple of places where they are a little ‘blotchy’. And on a couple the colour change from one to the next is sharper than I’d like, but then again, that might appeal to some people.

In the photo below you can see in the top skein and the third one down are a little patchy near the ends. But they are still lovely colours.


I’ve spent today back in the studio dyeing up another 25 skeins and another bunch of fat quarters and half metres. Now my feet hurt, and all the washing and rinsing is yet to come!

Oh, and here’s the white fat quarter the threads were sitting on. It’s not bad!


My dye table where all my dye bottles sit. I'm considering putting a piece of fabric down on the table next time, then I might get all that gorgeous patterning somewhere I can use it instead of just wiping it off.

Saturday, September 7, 2019

A Dyeing Day

I worked a twelve hour night shift last night, and no matter my good intentions, it’s hard work getting motivated the day after an all-nighter.

I sleep till past lunch, but then I rub my eyes and yawn through the rest of the day.

So one of my strategies to still get stuff done is to pick something immersive but that doesn’t demand a whole lot of concentration. Something I can do while listening to 70’s music!

Today the dye studio won the lottery.


It was beautiful down there (my studio is a platform built under our house) with the sun shining through the ti kouka tree, and I got stuck in and dyed a whole stack of my variegated fat quarters. These will be for sale when I talk at Whangarei Quilters next Saturday.

I also tried a slightly different way of dyeing my embroidery threads. Usually I dye these in lots of two or three and carefully control the colour variegations. But today I put them on top of a white fat quarter to soak up excess and then just kinda went for it.


I’m looking forward to washing these out. They could be stunning...or they could be mud...


I’ll keep you posted!

Friday, February 24, 2017

Results of using old fibre reactive dyes with vinegar on silk fabric

I recently posted about testing some old fibre reactive dyes on cotton fabric.  The results were dismal, but instead of throwing the dye out, I decided to test something I had read somewhere about using old fibre reactive dyes with vinegar (turning them into acid dyes) and using them on silk.

Before and after rinsing photographs when the dye was used on cotton.
I have never used acid dyes on silk before so I had to look around for information on how to go about it.  The companies that sell dyes have pretty good information on their websites and if you google your question you'll come up with lots of opinions.

The general consensus seemed to be that acid dyes need heat to work.  So I soaked my silk scarf in vinegar (apple cider just because it was what I had around, but I'd probably recommend just using white vinegar!) I squeezed it out and poured on the dye solution, which I'd previously made up to my normal strength recipe with water.

Then I put the whole container in the microwave, loosely covered to avoid splashes and buzzed it on high for three minutes until it was boiling, let it rest for a few minutes and then buzzed it again for another two minutes.  I let it sit for a couple of hours and then began to rinse it.

And rinse it.

     and rinse it

        and rinse it.....

This photograph is after several days of rinsing, soaking overnight and rinsing again.  The water was still not clear after the last night of soaking but it was a lot better than it had been (and I'd lost patience by then).  The colour is deep and vibrant.


So, in conclusion:
  • old, exhausted, fibre reactive dyes that no longer work on cotton fabric will work as acid dyes on silk fabric, but,
  • the resulting colour does not appear to be as colourfast as fibre reactive dyes used with soda ash on silk (I use that combination on silk frequently with great results).
Now, I have only conducted one experiment on this so I'm no great expert.  I think I need to conduct some further trials with some of the other old dyes that I've been given, particularly trialling different colours as they can behave quite differently.

For further resources on dyeing fabrics, try:

Dharma Trading http://www.dharmatrading.com/home/information-you-can-use-from-dharma-trading-co.html

Paula Burch http://www.pburch.net/dyeing.shtml

And, as Brenda suggested in the comments on my last dyeing post, Carol Soderlund is a bit of a dyeing legend and has great resources on her blog http://www.carolsoderlund.com

Sunday, February 12, 2017

Why it pays to test your dyes.

I received some old procion fabric dyes from a textile artist who longer needed them.  Unsure of their age or how they've been stored, I'm using them hesitantly and if it's for something important, I'm testing them first.

Here is a really good example why.


I made this blue dye up as per my usual recipe and added it to soda ash soaked cotton fabric as per
normal.

The top photo is the dye solution squeezed through the fabric.  I left it to batch for over 24 hours and then took the bottom photo after it was rinsed.  You always get some washout and lightening but the amount that I got is nowhere near acceptable and shows me that this particular dye has well and truly lost its potency.

I searched for Multicraft Manufacturing Ltd online and I found that it was dissolved as a company in 2009, so that gives me a hint as to just how old that dye might be!

The reason I was testing this particular dye was because I had been mucking about doing random serendipitous work with the gifted dyes and noticed that none of my pieces had turned out as blue as I expected after the rinse.  However, I also had a few pieces of silk organza in the mix and they are quite blue.  I've read somewhere that you can use old procion dyes on silk with vinegar (protein fibres work best with acid as a fixative whereas cellulose fibres need a base) and get good results.  So before I biff this jar of dye powder I'm going to run one more test on silk with vinegar.

Watch this space.

Wednesday, May 4, 2016

Let's have a catch up.

I don't know why I always think I'll have so much more time when school holidays are over.  It's Wednesday, the first week back after a two week break, and I haven't accomplished much off my 'when school holidays are over' list.  One of those things was to finally write a blog post, so I guess I'm achieving something!

Diving back into writing after a bit of a break is always tricky too.  Do I start chronologically from a few weeks ago?  Do I start from today?  Are the blog posts I had planned even relevant now?

Today's strategy is going to be a quick recap of the last couple of weeks to bring you (and me) up to speed on what I've been doing, and then regular transmission will resume shortly...


My kids spent some time with their cousins during the school hols, one of whom turned 13....and is mostly still lovely with shades of teenage moods creeping in.  At one stage I had five kids staying the night on the boat, which actually wasn't nearly as bad as it sounds.  I offered to pay them the princely sum of $3 each in return for making the kids' cabins and play room spotless.  Worth every cent!


Even though it's Autumn, there is the occasional stunner of a day.  Warm enough still to go for an afternoon swim.  You can see what looks like evening sun in the picture above - but it's only about 3pm.  We ate fish and chips after that.


Living in the area that we do, and living on a boat, it kinda follows that my kids will learn to sail.  They've done a couple of learn to sail courses and there is a professional sailing coach who has moved into the area so we are making the most of it.  

They spent the first week of the holidays at sailing camp - this means 9am to 3pm each day!  Yay for Mummy and yay for the kids because they had a blast.  Now they are both really confident little sailors.  They toodled off in the neighbours sailing dinghy the other afternoon all on their lonesomes without an ounce of worry.  I had a proud Mummy moment.


As for me, I've been trying to get a few smaller projects finished.  I made a scrap placemat for my boy to match one I made for my girl a little while ago.  Like the skull and crossbones quilting?


I've been pressing seams open (shock horror!) because I'm making a triangle quilt for a gift.  They will be six inch equilateral triangles and it was a lot easier to construct than I thought.  I didn't starch the bias edges and I'm pleased that I had hardly any stretching at all.  I'll be able to show the finished quilt very soon.


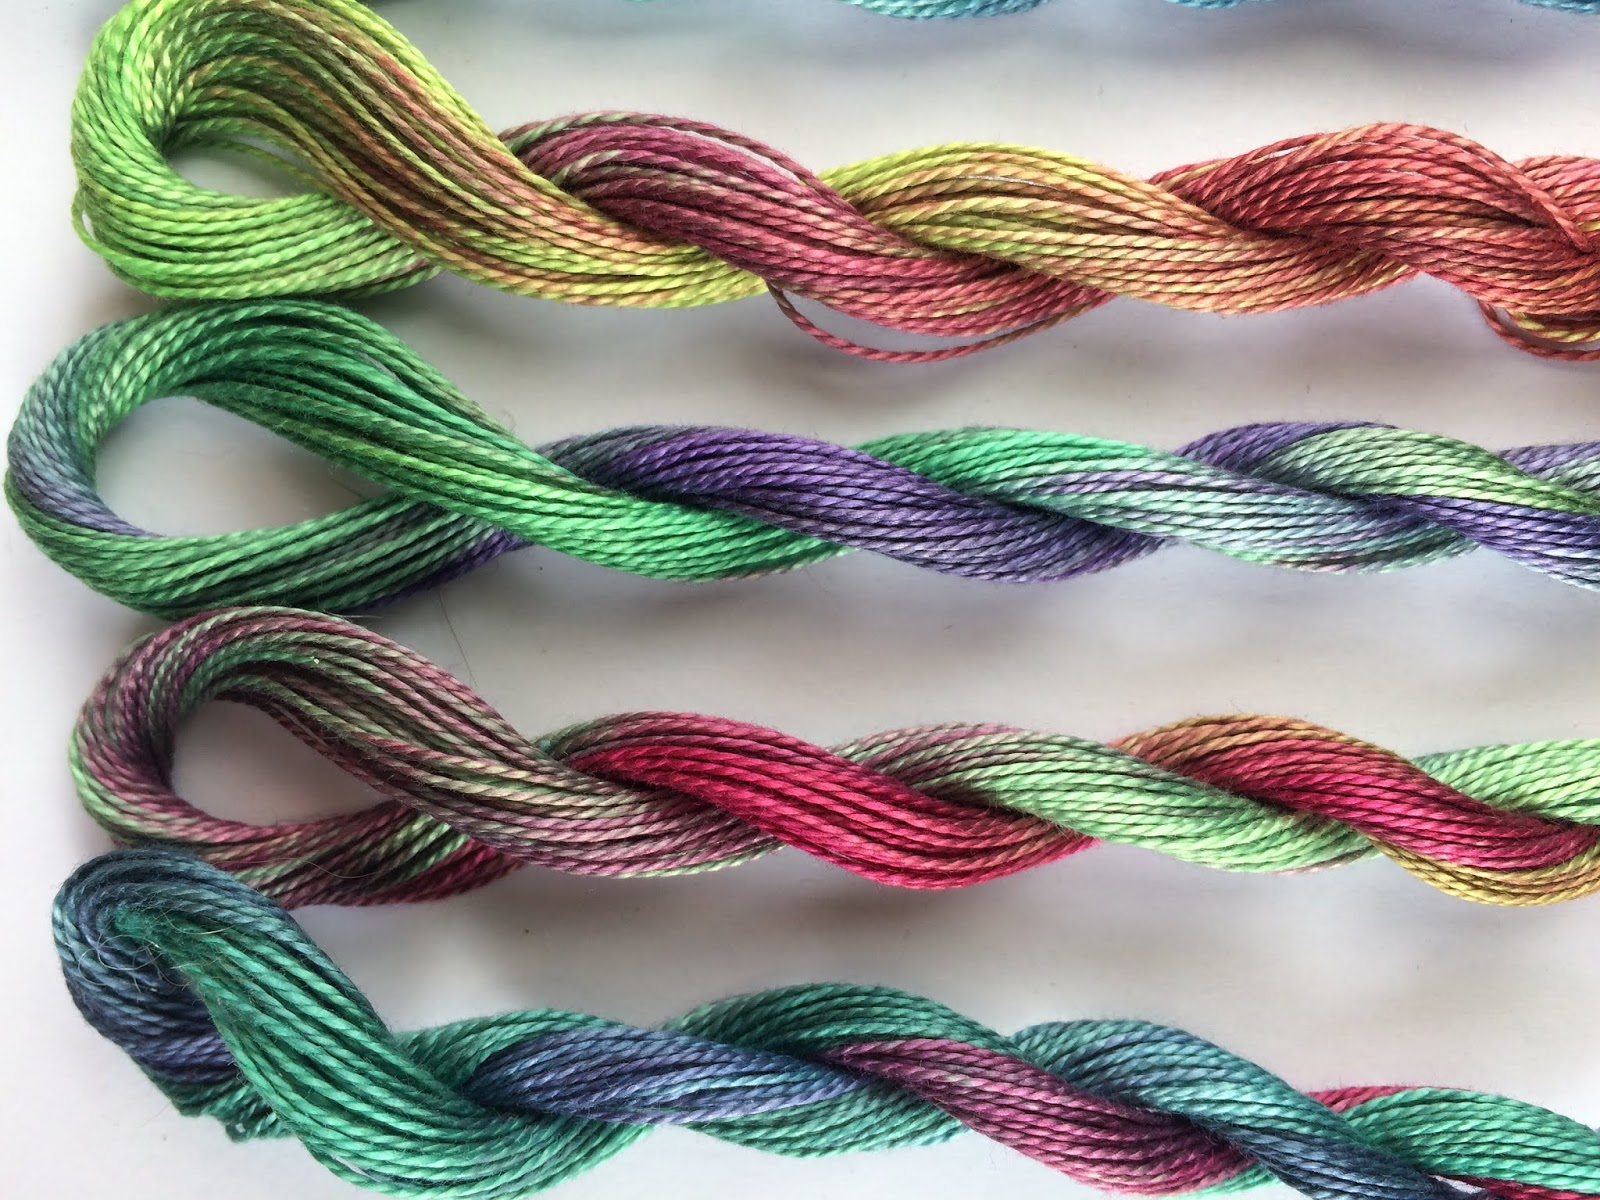
And I've been doing lots and lots of dyeing.  These are threads laid out to dry after rinsing.  


I've purchased a swift (hank holder) and ball winder and was given a measuring skein winder so I've been winding threads like crazy and having a lovely time playing in the dye pots.  More on that soon.


Oh, and I got a haircut.  Not sure how I feel about that.  I was sick of the long hairs everywhere and I guess it'll grow back!  Lots less shampoo use though.

So, that's news for now.  This weekend I'm off to The Great NZ Quilt Show in Rotorua.  Can't wait!  I'm taking my voice recorder and I have at least one interesting interview lined up for the podcast so watch this space.

Tuesday, January 19, 2016

Dye a little every day

I've been using the hashtag #dyealittleeveryday on Instagram for about six months now.  It was my aim to dye little and often to build up my supply of hand dyed fabric without having to do marathon rinsing efforts (my least favourite part of the process).


No, I haven't managed to dye or post a photograph everyday!  But I have built up my supplies like I wanted.  And there have been other benefits to a regular dyeing practice.  I've honed my studio practice at the dyeing bench to produce fabrics without too much fuss and bother.  I also have worked out methods that suit me and processes to get quite different looks depending on what I want.  Basically, I've been increasing my skills.


There are lots of benefits to a regular creative practice.  I keep meaning to start a regular sketchbook practice but haven't quite got there yet.  I've seen people start daily photo practices or challenges, weekly mini-quilt challenges, printing, scrapbooking, painting, you name it - people will have done it.

Cynthia Morris, over on Original Impulse, wrote a nice blog post on regular creative practices.  She talks about how doing it can develop your skill, help you recognise your style, and learn to get pleasure out of the process.  It's worth heading over to read.

Do you have a regular creative practice?  I'd love to hear about it and how it works for you.  Or have you started one that fell by the wayside?  What do you think went wrong?

Happy creating everyone.

Sunday, October 18, 2015

Last week

Last week seemed a busy one.  All my weeks seem busy at the moment - and I don't necessarily believe this is a good thing.  I don't subscribe to the 'busyness' ideal that seems to pervade our lives.  I like to have time to be slow, to enjoy, to watch and listen.  But that doesn't seem to be happening much lately.  Maybe I have to make time.

But at least I've been busy doing things I enjoy.  Well, mostly.  Housework will never go away, no matter how busy or un-busy I am.


I've been free-motion quilting this little wall hanging.  I even got most of the binding on too (let's not talk about the hanging sleeve shall we?).


I got to spend some time at the beach watching these two little loonies.  Love that expression on her face - her big brother just landed in the hole next to her after taking a flying leap.


I took a walk while they dug and snapped this pic.  We live in a truly beautiful place.  I hope I never get too busy to notice.


I spent some time appliquéing this piece of work.  I also spent quite a few hours auditioning fabrics for sky, placement of elements, thread colours etc.  But I'm glad it's finally coming together.  Once I start sewing, I can make an ever decreasing number of changes and it becomes easier to just accept it how it is, not what it could potentially be.


The dye studio has been calling my name again and I've been dyeing some skeins of thread.  These four colours got two dyeings.  The first time around I forgot to untie the loose knots I use to keep the skeins tidy, and even though they were loose, they made a stripey look - unintentional shibori.  But over dyeing worked and I managed to get my colours very close to the original ones I had.  


We were busy celebrating a birthday too.  I'm the Mum of an 11 year old!  The cake was made with almond-meal and a little coconut flour so my Hubby, who is starch-free (no grains, legumes, root vegetables etc) could eat it.  And it was delicious!  Might have been the chocolate ganache that it was smothered in...


And then I was busy tooting my horn!  New Zealand Quilter, the only New Zealand based quilting mag available, published an interview with me!  Stoked!  

It's a great issue - also featuring my good friend Mathea Daunheimer with an article on her viewer's choice winning quilt, a write up about my local quilting club, the featured blog was the blog of another quilting friend, Leeann, and there were lots of other interesting articles and pretty pictures as per usual.  Thanks NZ Quilter, and Norma Slabbert, who wrote interesting questions for me to think about.

Next week promises to be busy too.  But I'm going to be mindful of spending a few hours not worrying about what I should be doing next, just sitting and enjoying, and feeling grateful for all I have.


Thursday, August 6, 2015

The Siren Song of Colour

These photos make my heart very, very happy.


I rolled up my sleeves on Monday and got stuck into some dyeing.  I wanted some smaller items for sale in Opua Arts gallery and so some of my dyeing was on ready made silk scarves.  

These are habotai silk that shimmer and gleam and float in the breeze and generally just look gorgeous!  I hung them up this morning after popping next door to the marine chandlery for some smooth white rope.  What do you think of my display system?

I also did some more embroidery threads.


These are a silk cotton blend, unstranded and similar to a light-weight perle cotton.

I'm going to change my dyeing habits a little.  A full day of dyeing (4-6 hours) ends up in sore feet and a sore back and another full day of rinsing, washing and pressing - phew!  Instead I aim to dye a little every day.  And I'll be posting a images of my dyeing over on Instagram with the hashtag #dyealittleeveryday.  Click on the camera over on my left sidebar to follow me on Instagram and see what I'm up to.


Tuesday, April 1, 2014

Did you know you can dye quilt batting?

Sorry!  More hand dyes.  Are you getting sick of them yet?  But I wanted to show a few experimental bits and pieces that I threw dye on.


So, clockwise from front left: cotton stranded embroidery thread, really cheap and nasty wool batting, cotton batting, my usual high-thread count cotton sheeting, woollen blanket, silk, repurposed linen.

What I learnt:

  1. Wool does take non-acid dyes, just not as strongly as cotton, although cerulean blue just seemed to wash straight out (i.e, that orange wool was a tangerine and blue mix to make turquoise).  More experimentation needed.
  2. Cheap, nasty wool batting is still cheap and nasty.  It felted a bit, which helps it's structure but it's still too soft to use in a wool appliqué project.  Yummy colours though and I could used it for a little hand-stitching art project I have in mind though.
  3. Cotton batting takes the dye really well, but I should try and find some without scrim because this shows through a little on one side.
  4. I need to find a thinner, finer wool blanket than the one I had.  Two pieces were from a thinner one and the rest were a much courser weave - big difference in the hand of them.
  5. Old linens take the dye beautifully.  Must keep my eye out at the op shop!
  6. I love dyeing, I already knew that, but I just confirmed it again.


I know I'm never going to be the best photographer, but I'm trying to improve and practice my skills.  Here I was trying for bokeh, or blur, by increasing the distance between my foreground and my background.  I like the look, what do you think?


And I'm so pleased with my deep purple.  Been hanging out for my black dye, and it finally arrived.  It's makes the best greens too.  Those greens are all made with black and yellow.


Loving the dye on the cotton batting.  It looks like watercolour paintings.  Now I just need to make something with it.

Sunday, March 2, 2014

Hand Dyed Fabric - lighten up


I squeezed in a little fabric dyeing this weekend.  I need to get some lighter colours, some tints, to round out my hand dyed collection.  I also need to get some shades, which are blackened colours, but I discovered I've run out of black dye so that wasn't happening today.


They are very clear and bright.  I think I need to muddy some of my colours up a little to get some more interesting colours, but these definitely add a lighter aspect to my collection so I'm not unhappy with results.  I could also do another round of dilution in the orange and fuchsia, but I ran out of soda ash soaked fabric.


A brief explanation of how I dye my fabrics:
I take my prepared for dyeing fabric and rip it into fat quarter sized bits.
I write a number on the corner of each one for record keeping purposes and then put them in a bucket of soda ash solution, roughly 1/2 cup soda ash to about 8 litres of water.
I use procion mx dyes and I mix about 1 1/2 teaspoons of dye powder to one cup (250 mls) of water.
Then I pull out a piece of soaked fabric, wring it out and squirt on my dye.
If I want to make a mixed colour or dilution, I aim for about 1/5 cup (50 mls) of dye solution per fat quarter.
Leave it sitting for as long as you can (I often leave it overnight), then rinse and wash etc.
REMEMBER: use gloves, a mask when the dye powder is exposed, and utensils and pots reserved only for dye use.


The rest of the weekend has been taken up by the never ending housework, baking for lunch boxes, stitching with my quilting group (if you listened to my podcast yesterday, you'll know I got in a bit of hand binding), helping hubby build a deck outside our back door and painting another window frame (second to last one!!).

And now I think I'll settle in for the evening with my hand binding on my lap and a cup of peppermint tea and my hubby to keep my company.

Thursday, December 19, 2013

Stressfully squeezing in some fabric dyeing

Hand dyed fabrics, silk habotai on the top and cotton sheeting from the pink down.  And my cute little storage bucket.  I feel a few more of these might just have to be made...perhaps in graduating sizes?
So I managed to get the little fabric buckets (because that's what they were if you were trying to guess) finished in the nick of time for the kids to take off to school in the morning.  

I had chosen the highly patterned fabric for mine, but of course that's the the one BOTH children wanted.  I got the orange hatch mark fabric in the end.  

The outside is made of a heavy linen and the contrast fabric is on the bottom of the bucket as well.

  Suz asked why there were three?  Because my daughter had a new graduate teacher this year and so had an older teacher helping out every week = two presents to stress me out!


Holiday prep is kicking my butt.  That's why you got the terrible iPad photo and post the other day.  I feel like I'm a wee bit stretched.  But it's really my own making.  Why on earth I would try and fit a little bit of fabric and thread dyeing in when I have a to-do list that just squeezes onto an A4 sheet of paper, I just don't know.  

But today was the first day of school holidays for the kids and I'm on annual leave for the next couple of weeks so that's making it easier.  

All the presents that had overseas destinations have been organised and I'm well started on packing for our annual camping trip.  

I've been a bit of a grinch and said no to a lot of Christmas functions and that's helped ease the load too.  Why do we feel the need to go to party after party after party?  I could go to at least three work related do's if I so felt the need!  But being the bosses wife, I do have to make an appearance at Hubby's work BBQ tomorrow - I'll put my non-grinch face on and fake it!

I hope to be back with a few more posts, but if I'm not Merry Christmas or happy whatever-you-happen-to-celebrate and keep it safe, people.  I want to see you all back in 2014!

Wednesday, August 14, 2013

Fabric dyeing a colour transition and big news


These are what I've been doing in my spare time recently - my play time!  I've been wanting to try this for a while and even just doing two has taught me lots.

These were all fat quarterish sized squares of plain white fabric.  I soaked them in a soda ash solution then wrung them out and crammed them into small plastic pottles and poured just enough dye over them to be able to squeeze it through.  It's called low-water immersion dyeing and gives quite a mottled effect.


I thought I'd show you a page from my dye workbook.  It's where I keep notes of all my techniques and recipes and samples so if I want to replicate something again, I have a record of how I went about it.  I think it's really pretty looking!  However the purple and green remind me a little of my eyes....


Oh yes, the bump got better but the eyes got worse.  Kinda scary looking!  (No laughing, Cat!)  I had to go to work today and lots of explaining had to be done!  I told one friend my botox went wrong ;)

Now, on to my impending changes that I hinted at.  Two major happenings - I am applying to study Art next year.  I'm comparing a couple of different courses that I'm interested in, but I'm definitely applying and I'm really excited!


The other thing is that we are trying to buy a new house.  Except that it doesn't really qualify as a house, I reckon it's a dump.  Hubby is desperately trying to make me see it's good points.  That's part of the driveway in the pic above.  There is no way you could get down it without a four-wheel drive and I wouldn't be brave enough to drive it even then.  The pic is of the good part, the other parts I was holding on too tight!  The couple of good things about it is that it's closer to town and it's water-front with a jetty.  Can you tell I'm not as enthused about it as Hubby?  I guess I can see the potential, it's not every day that waterfront property comes along in such bad nick that we could afford it.  But the amount of work to whip it into shape is daunting!  Wish me luck!

Thursday, January 31, 2013

Hollis and the Kokako

I've just come home from a five-day workshop in Auckland with the amazing artist Hollis Chatelain.  Hollis hails all the way from North Carolina.  She paints her beautiful quilts with dye and then uses quilting lines to enhance the images.

It was pretty fantastic to have five days soaking up as much knowledge as I could.  I had lovely classmates too - which always makes for a good workshop experience.  But oh, I was glad to get home!  The traffic, noise, and the sheer number of people in Auckland sets me on edge after a while.  So I guess that's something else I learnt in the workshop - I'm a rural girl through and through (just call me hermit).

Want to see some pics?

Finished painting with dyes, still damp.
Washed out, dried and ironed.
Halfway through the quilting process.
Hollis is a talented teacher as well as an artist.  She keeps you working, encourages you to be brave and gives you lots of helpful insight.  She insisted that we paint three pieces as it's a matter of getting the hours in with the paintbrush to start seeing improvement.  And whilst we grumbled and groaned, she was right!


Here are all three of my pieces on the wall.  This pictures shows them when they are washed out and dried but no quilting started yet.  I'm really, really looking forward to playing around more with this technique.  It is totally different from using fabric paints and unlike paints you end up with a beautifully soft fabric- yay!