My name is Charlotte, sometimes known as Ms Lottie, occasionally as The Slightly Mad Quilt Lady. This is my blog, where you'll find me writing a lot about my quilting and textile arts and a little about my family's life in a small seaside town in New Zealand. Haere mai!
Showing posts with label hand dyed fabric. Show all posts

Sunday, April 19, 2020

Lockdown Day 25

The first couple of weeks of Lockdown were sunny and hot and it felt like a bonus Summer. I was glad I took the opportunity to do some outside dyeing about three days in a row.


I haven't done much dyeing lately because we've been in a bad drought since November, eventually we were on Level 4 water restrictions, which means essential use only - drinking, cooking and hygiene. The garden went to seed except for what I could keep alive with grey water. And there was no way I was going to be able to justify using water to dye with. 

Then we had a little rain and I decided to start dyeing again, but not rinsing, as it's the rinsing process that takes the big whack of water with the way I dye.

This is part of the current stack waiting to be rinsed. I've let them dry so I can store them.
Thanks to Covid-19, very few tourists are in town and water usage has dropped markedly. We are now at Level 3 water restrictions, so still no rinsing of fabrics, but it really feels like we've turned the corner towards Autumn. Daylight savings is over, the light disappears quickly, and there is a chill in the morning air that makes my thoughts turn towards slippers and hot stews. And we've had more rain, enough to start planting the garden out.

Even without the sun I did a little dyeing today. Splashing colour around is so satisfying. And even better, I listened to a podcast with Carol Sodurland (fabric dyeing legend) being interviewed by Julie Fei-Fan Balzer (art journalling legend) while I played worked.


But she got me thinking. Carol is the queen of process. She teaches a system where her students come out with a book of more than 1000 (yes, ONE THOUSAND!) swatches and recipes how to repeat that colour. I used to keep swatches of almost everything I made so I would know how to do it again, but now that I know what I'm doing, dye all the time, and have my favourite techniques, I don't really bother. 


But I'm thinking maybe I need to update my swatch book. There are a couple of extra colours of dye I use now, and I never completed every gradation and greyed colour that I wanted to. Maybe I need to discipline myself to swatch up all my variegated colours that I do so I can repeat them exactly - or as exactly as dyeing gets. 

Or I could just take a class with Carol. One day, that would be my dream!

Who is your dream tutor? Who would you travel especially to learn from? 

My favourite recent piece. This is a big embroidered tablecloth and I can't wait to see how it looks rinsed and dried.

Saturday, June 30, 2018

100 Days Project 2018 - Reworked Cloth

Back in May I wrote about my upcoming 100 Days Project.  Well, it's started, and today is day 20.  My project is all about experimenting with adding layers of surface design over the top of my already hand-dyed fabric.  You can read more about how I came up with that project back on the original blog post.

I asked for suggestions for names and hashtags and Linda suggested #100daysoflayers.  I was going to use that (thanks Linda!) but it's already been used on Instagram for a few other things - beautiful things actually, you should go and search that hashtag when you've got a minute.  In the end I spent some quality time with my thesaurus and came up with #100daysofreworkedcloth.  Still a bit clunky, but at least it's all mine - so far.

Day One Fabric, before and after.

Twenty days means I'm one fifth of the way through, but I feel like I'm just getting started.  I've generated 20 new fabrics, but I've also generated many more ideas and questions and leads to follow.

For example, should I try every technique in high flow acrylic inks AND dye to compare the results?  Should I do one technique in multiple colour ways?  There's so many techniques available to me, should I simplify by just sticking to dye and not paint?  What if I used a foam roller rather than a hard brayer to spread the dye paste onto that leaf?

I'm not sure of any of the answers to those questions.  So I'm just continuing, with not much planning at this point, but having a lot of fun.

One thing I'm glad I did, is set up a good note taking process before I began.  I take a photograph of the fabric before I begin and snip a swatch to put in my book.  I make and create, and then once the fabric is finished, I photograph it again and snip another swatch.  In my journal I make extensive notes about what I did, the colours I used etc.


The process falls down sometimes when I forget to take a photo before I start, but I'm getting better at  working ahead a bit and photographing things in batches when the light is good.  At the end of the project I'll have a book full of 100 surface design samples, so I'll have something very concrete and usuable for years to come.

Day 10 Fabric, before and after.

Because I'm only doing one or two pieces a day I can spend some time considering my results more than I would if I had spent a whole day dyeing fifty pieces of fabric.  It's this musing that is leading to all the questions I talked about earlier.  Sometimes the project feels like it could grow exponentially (and out of control!)

I'll check back in when I have a few more favourite fabrics to share, but for now here's day 14 before and after, which I think is my most dramatic change, and day 4, which I think is my weirdest...


Monday, May 14, 2018

100 Day Project 2018

June will see the start of my 100 Day Project for 2018.  A 100 Days Project (or Challenge) is really just what it says - 100 days in a row of doing something creative, again and again and again.  I've completed two 100 Days before and I've found them immensely rewarding.  I've also found them frustrating and challenging, but that's all part of the package!

Day 1-20 of 100 Days of Scissors.

Last year I completed 100 Days of Scissors, where I cut paper and formed collages.  I developed my composition skills and now I have a sketchbook full of ideas and inspiration.  I also realised that I prefer to cut to a drawn line rather than free hand!

My first 100 Days was 100 Days of Faces, with the intention of getting comfortable with sketching faces and using them in my work.  Again, I have a sketchbook full of ideas and inspiration and I'm much more confident with my face drawing skills.

Sketchbook page from 100 Days of Faces

This year, the organisation that has previously hosted the 100 Days Project NZ is taking a break, so I'm working with Lisa Call and Kate Hartmann of Tutere Gallery, who have jointly developed their own 100 Day program.  I thought about working on my own, but I know myself well enough to know that to stick with it and commit, I need the accountability and community that a group can offer!

There are different tiers of support with Lisa and Kate's program and I believe the in-person programs are full, but there are still spaces to join the on-line program running through email and Facebook if you'd like to jump on board and join in.

One of the hardest things about 100 Days is deciding what sort of project to do.  It has to be small enough to complete EVERY SINGLE DAY, challenging enough to stretch you and interesting enough but easy enough to stick with over the course of more than three months.

Then you need to think about what you want to do with the final works.  Are they just inspiration for future projects?  Do you want to have a body of work to exhibit or sell?  These decisions will also influence what project you decide to do.

To help me make some of those decisions, I got out my trusty pen and paper and did some brainstorming.  What did I want to get out of this year's project?

  • help me get into a regular studio habit
  • get me working with joy and curiosity
  • find something new
  • a body of work or a collection of inspiration

Then I brainstormed ideas for projects:

  • flora printing
  • botanical drawing
  • bird drawing
  • clothes making
  • fabric collage
  • colour - dyeing, painting, colouring fabric
  • free-motion quilting
  • surface design
  • art on the iPad
  • improv piecing
  • drawing patterns

Then I put those two lists together and I've come up with something that I think will work on all levels for me.  My intention is to 'renovate' my hand-dyed fabric stash.  This means that every day, for 100 days, I'll take a piece of my hand-dyed fabric and I'll add another layer of surface design to it. Whether that be another layer of dye, a printed pattern overlay, perhaps taking colour away with discharge dyeing, or even drawing straight onto the fabric.

  
Either way, after 100 days, I'll have 100 surface design samples; I'll have tried out lots of new ideas and practiced old ones; I'll have got back into the habit of regularly wet studio time and I'll hopefully have had lots of fun!  

Now I just need to come up with a funky title for my project and a hashtag that I can use on Instagram to collate my images.  #100daysoffabricrenovation is a bit clunky.  Any ideas?

And have you ever done a 100 Day Project?  Are you doing one this year?  What were your challenges and triumphs?  I'd love to hear from you.

Tuesday, May 2, 2017

So you dyed an ugly piece of fabric...

what do you do now?

Because dyeing results are the product of so many variables: dilution, type of fabric, temperature, manipulation of fabric, age of dye etc, there is always a bit of serendipity.  Plus, if you are constantly experimenting to see if you can get new and interesting patterns, you are sometimes going to get ugly.


It's a shame I can't find a picture of this piece of fabric before I added the blue.  But I probably didn't take one because it was such an uninspiring, insipid yellow.

It's a half metre piece, so I folded it in half and then formed some sort of circle shape that I fastened with rubber bands (I can still see the rubber band marks) and over dyed it with navy blue.

Hmmmm.  Still pretty uninspiring.  The contrast was pretty wild, I couldn't ever see myself finding a use for it in my studio, so I stuffed it back into the 'one day I'll overdye it' bag.

One day I did overdye it.  This time with an orange.  I think I made it even worse....


Woe is me!  I couldn't even bear the thought of putting it on the back of a quilt.  So in a last ditch effort, I cut it into two fat quarters.  One I dyed black and one I dyed brown:


Well, the brown one still has quite a defined pattern, but the contrast is taken down a peg or two and it almost looks like a wood grain/end of log pattern.  I could imagine finding a use for it now.

But the black!  The black I call success!  There is a subtle richness to it with hints of lots of different colours throughout.  You can almost see the original blue pattern but only just.  There is nothing flat or dull about this dark colour (you might have to see it up close and personal to really appreciate the fullness of colour - you know what they say about photographs and doing justice and all that).

So.  Did you dye an ugly piece of fabric?  Well, just keep dyeing it until you get something you like.  If all else fails - go black!

(And if even that fails, well, we all need a new clean up rag now and then don't we?)

Edited to add:  As my lovely commenters have pointed out, beauty is in the eye of the beholder and what I deem as ugly might be lovely to someone else!  So there is another choice if you've dyed an 'ugly' fabric - see if someone else loves it and wants to give it a home...

Sunday, April 30, 2017

Hand Dyed Fabrics For Sale


I've been getting back into the swing of hand dyeing fabrics regularly.  It's one of my greatest joys to play with colour and try and decipher the language of dyes to get beautiful results every time.  There's only one problem with that - not enough cupboard space!

Now that I don't have a gallery and shop to sell my hand dyed fabrics through, they are beginning to pile up and spill over.

I'd dearly love to keep them all, but seeing as I couldn't possibly use them all in my lifetime, it's time to part with some.

These fabrics are high-quality 100% cotton broadcloth, width 114cm.  I use this as it's a little bit more tightly woven than quilting cottons, but not so tight that it's difficult to stitch through, and it has a beautifully smooth finish.

The dyes I use are commercial grade fibre reactive procion mx dyes.  They have great fade-resistant qualities as they form a chemical bond with cellulose fibres (but never store your fabrics in direct light).

I'm pretty confident you won't get colour runs when washing my hand dyes as I rinse and wash the bejeezers out of them - having a colour run on one of my quilts is my worst nightmare - but I can never guarantee things 100% due to water quality differences, different detergents or leaving quilts to sit damp (don't ever do it - dry quilts as soon as they have finished washing!)

So, on to the fabrics, they are all more or less one metre wide except this first one.


Fabric A - half metre dark purple ripple pattern.  This has some fuchsia touches at the top and bottom edges and a base colour of turquoise and darker blue vertical stripes peeking through. $NZD14 plus postage.


Fabric B - The photo doesn't give the richness of this fuchsia over-dye justice.  It's hard to photograph colours 100% accurate, I've done my best to get them looking right on my computer screen, but remember that different computer monitors may show them a little different.  $NZD28 plus postage.


Fabric C - This one is an interesting rippled pattern that I made as a base fabric for an underwater quilt.  I made several though, and this one didn't get used.  It has turquoise sections interspersed with some muddier green and brown sections $NZD28 plus postage.


Fabric D - SORRY SOLD - my favourite!  It reminds me of a Monet waterlily painting.  Aqua and turquoise with touches of pink deepening to navy blue towards the bottom edge.  $NZD28 plus postage.


Fabric E - SORRY SOLD -  One of my water ripples and reflection pieces.  Greys, purple/blue and a touch of aqua.  This has some beautiful shapes and colour changes through it.  $NZD28 plus postage.


Fabric F - highly patterned with lots of interest through it, this piece was dyed chartreuse but crammed between fuchsia and burgundy pieces resulting in some really appealing crease patterns and a sprinkling of white highlights.  $NZD28 plus postage.

That's enough for now.  I might put up some smaller pieces soon, perhaps some fat-quarter bundles?  Let me know if there are any specific colours you are interested in.  

If you wish to purchase any of the pieces above, please email me theslightlymadquiltlady at gmail dot com

New Zealand postage:
Half a metre of fabric fits in a paper A5 envelope and costs $2
I can fit up to two metres of fabric in $3 prepaid bag
I can fit up to four metres of fabric in a $4 prepaid bag

Overseas postage needs to be quoted individually so please email me for a rate.


Thursday, March 30, 2017

More Fabric Dye Test Results


I've been testing more of the old dyes that were donated to me.  In each colour group, the colour of the dye solution when made up is in the top photograph, and the fabric, after it is rinsed and dried, is in the bottom photograph.  In this set, from top left going clockwise, is reddish navy, purple, fuchsia and eggplant.


Not a bad result at all.  And no, I haven't upped the saturation, fuchsia is just so pink that it almost hurts your eyes.


Again, from top left clockwise: golden, orange, rosebud and bright yellow.  The orange has washed out significantly but the rest are pretty good.


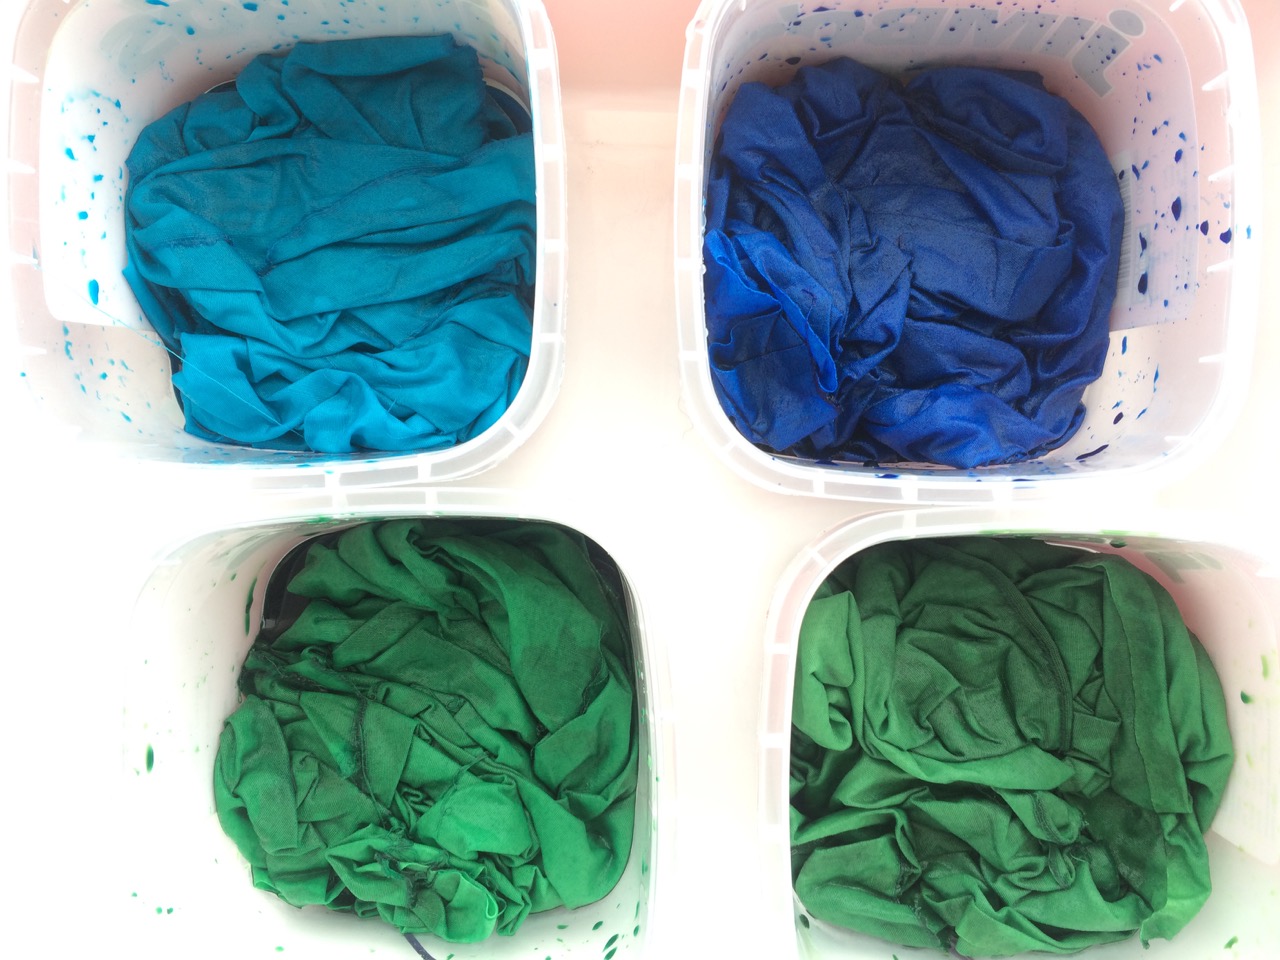
Here we have jade green, intense blue, grass green and brightest green.  I don't know who's idea of jade that jade green was, but it's not what I'd call jade.  And intense blue washed out to a nice summer sky blue.  


None of them are as bad as the blue I first trialled.  They all still have enough potency to be usable.  But I've taken snippets of these test fabrics and pasted them in my dye book for record keeping purposes.  I've also taken snippets and glued them onto the tops of the dye powder jars so I'll remember at a glance that some of these are not what they seem from the name.

Friday, March 17, 2017

How to dye silk organza. Technique 1

I've been asked for some more information about how I dye my silk organza.  I'm planning to show you several different techniques that I use, one per blog post, so watch for more to come.

Note:  Safety first folks!  Wear your protective gear when you're dyeing and use a dust mask when working with the dye powders.  Use measuring, mixing and dyeing equipment that is reserved only for dyeing and keep food and drink out of the dyeing area.  Use your common sense and you'll be fine.

First, I purchase silk organza in bulk so I can cut off what I need when I want it.  It's not cheap, but it's worth it.

Next, I make up my dye solutions.  I use fibre reactive dyes from Dharma Trading Co and mix 1 tablespoon (that's a spoon that measures 15 liquid millilitres in NZ) per 2 cups of water (500 millilitres in NZ).  I know people weigh their dye powders to be more precise and get percentage solutions, but that's a bit too exacting for me).  I leave these dye solution concentrates in my studio fridge and then I can mix these together, dilute them or whatever I want to do, whenever I want.


Piggyback serendipity is what I sometimes call the technique that I'll show you today.  I often have some bits of organza already cut and just grab one when I'm dyeing my cotton fabric and do the same treatment on it.  So it's piggybacking off what I'm doing with the cotton fabric.

You'll always find a bucket of soda ash solution in a corner of my studio.  I like to leave my cotton fabrics soaking in there for at least 24 hours before I dye them.  I think it helps with 'opening' up the cotton fibres to accept the dye.  And of course, soda ash is needed as part of the chemical reaction with the fibre reactive dyes that I use.

But I don't leave my silk to soak.  Silk prefers acid rather than base solutions to preserve it's lustre, so I keep the exposure to soda ash to a minimum.  I just dunk it in the soda ash bucket and squeeze it through.


Today I was planning to do a tray dye on a metre piece of cotton.  So I accordion folded up my organza before I put it in the soda ash.  It's hard to handle and fold when it's wet, so unless you like wet silk organza sticking up all over your arms, try and fold it dry.


I fold and scrunch it into different shapes depending what I'm planning.  An accordion fold means that the colours will repeat across the length.  Then I scrunched it to fit into the tray.  If you wanted water ripples, you could pleat it up more regularly.  Or you could scrunch one area and have another area lying completely flat.  Experiment, it's part of the fun!


My cotton fabric goes on top folded into whatever shape I want and then I pour my dye solutions over.  Today I used some yellow and red to make orange, added some water to dilute then added a bit of navy for brown.  I'd pour on a bit and then add some more dye to alter the colour a bit but keep it related to the first colours.  I added turquoise, then some navy and then some more yellow and a bit of water here and there.  Now you can see where the serendipity bit of the name come from.


Press it all down so you know it's squeezed through then leave in a relatively warm place for at least four hours, and overnight if possible.


Rinse it all under cold running water until the water runs fairly clear.  I then soak the fabrics in warm water, changing the soaks every now and then, usually leaving it overnight at some point, until all the excess dye is gone.  Then separate the silk from the cotton, wash the cotton in your washing machine on hot and hand wash the silk with warm water.


Dry, press and use in whatever way you wish!  Above you can see the two finished pieces from this particular dyeing session.  Organza on the left and cotton on the right.  Silk picks up the dye very well so the colours look a little deeper on the organza, but remember you are seeing it double thickness and with a green backdrop (thanks to the recent rains for greening everything up!)

And look how that cross shape comes through the organza....now there's a little piece of inspiration....

Friday, February 24, 2017

Results of using old fibre reactive dyes with vinegar on silk fabric

I recently posted about testing some old fibre reactive dyes on cotton fabric.  The results were dismal, but instead of throwing the dye out, I decided to test something I had read somewhere about using old fibre reactive dyes with vinegar (turning them into acid dyes) and using them on silk.

Before and after rinsing photographs when the dye was used on cotton.
I have never used acid dyes on silk before so I had to look around for information on how to go about it.  The companies that sell dyes have pretty good information on their websites and if you google your question you'll come up with lots of opinions.

The general consensus seemed to be that acid dyes need heat to work.  So I soaked my silk scarf in vinegar (apple cider just because it was what I had around, but I'd probably recommend just using white vinegar!) I squeezed it out and poured on the dye solution, which I'd previously made up to my normal strength recipe with water.

Then I put the whole container in the microwave, loosely covered to avoid splashes and buzzed it on high for three minutes until it was boiling, let it rest for a few minutes and then buzzed it again for another two minutes.  I let it sit for a couple of hours and then began to rinse it.

And rinse it.

     and rinse it

        and rinse it.....

This photograph is after several days of rinsing, soaking overnight and rinsing again.  The water was still not clear after the last night of soaking but it was a lot better than it had been (and I'd lost patience by then).  The colour is deep and vibrant.


So, in conclusion:
  • old, exhausted, fibre reactive dyes that no longer work on cotton fabric will work as acid dyes on silk fabric, but,
  • the resulting colour does not appear to be as colourfast as fibre reactive dyes used with soda ash on silk (I use that combination on silk frequently with great results).
Now, I have only conducted one experiment on this so I'm no great expert.  I think I need to conduct some further trials with some of the other old dyes that I've been given, particularly trialling different colours as they can behave quite differently.

For further resources on dyeing fabrics, try:

Dharma Trading http://www.dharmatrading.com/home/information-you-can-use-from-dharma-trading-co.html

Paula Burch http://www.pburch.net/dyeing.shtml

And, as Brenda suggested in the comments on my last dyeing post, Carol Soderlund is a bit of a dyeing legend and has great resources on her blog http://www.carolsoderlund.com

Sunday, February 12, 2017

Why it pays to test your dyes.

I received some old procion fabric dyes from a textile artist who longer needed them.  Unsure of their age or how they've been stored, I'm using them hesitantly and if it's for something important, I'm testing them first.

Here is a really good example why.


I made this blue dye up as per my usual recipe and added it to soda ash soaked cotton fabric as per
normal.

The top photo is the dye solution squeezed through the fabric.  I left it to batch for over 24 hours and then took the bottom photo after it was rinsed.  You always get some washout and lightening but the amount that I got is nowhere near acceptable and shows me that this particular dye has well and truly lost its potency.

I searched for Multicraft Manufacturing Ltd online and I found that it was dissolved as a company in 2009, so that gives me a hint as to just how old that dye might be!

The reason I was testing this particular dye was because I had been mucking about doing random serendipitous work with the gifted dyes and noticed that none of my pieces had turned out as blue as I expected after the rinse.  However, I also had a few pieces of silk organza in the mix and they are quite blue.  I've read somewhere that you can use old procion dyes on silk with vinegar (protein fibres work best with acid as a fixative whereas cellulose fibres need a base) and get good results.  So before I biff this jar of dye powder I'm going to run one more test on silk with vinegar.

Watch this space.

Friday, March 18, 2016

Colour Palettes on Friday

One of my favourite activities is playing around with my hand-dyed fabrics, putting together colour palettes.  My fabrics are my paint box and tools and I can learn a lot just by playing around with them.  Any excuse for fabric fondling, right?


What I observe sometimes when other quilters are putting together colour palettes, is that they don't play around with proportions.  They stack a beautifully folded pile of fabrics together and look at it.  But rarely do you use equal amounts of fabric in a quilt.  So change the way you fold them and look at how the colours work together when there are different amounts of each.


Then I sometimes use this internet tool to check how the different proportions might look in actual pictures.  It's called TinEye Labs Multicolr Search Lab, and it searches Flikr creative commons images for photographs that match your chosen colours and proportions thereof.

Below is the search I did based on the proportions of colour in the above mix.  Whoa! Look at all that orange, and I can now see that the orange is about the same tonal value as the pink, so there is less tonal contrast than I might like. (Click on the image and that should biggify it if you need a closer look.)


The photo above and the search results based on proportions below.  This reminds me of sunsets and I like the large proportion of light - some nice contrasts.


Above is the photo, and below is the search with the roundabout proportions.  Lots of pinky purple coming through here.  More restful perhaps?  And once again, less tonal contrasts.


And below is the search I did with equal colour proportions.  I find it a bit messy, or perhaps busy is a better word, no focal colour that draws me in.  


So how do you play around with your colour palettes?  Do you rearrange your stacks to get an idea of how fabrics play with others in your chosen scheme?  And do you rearrange proportions to see what different looks you can get?

Wednesday, September 16, 2015

Podcast - Spring Update on The Slightly Mad Quilt Lady

It's been a while folks, but here's a podcast for your listening pleasure.  I have a few interviews lined up for the months ahead, but today's episode it all about me.  I give you an update on living aboard - do you know it's been a year since we moved onto this boat?  Opua Arts Studio and Gallery gets a mention and I manage to fill in about 50 minutes of airwaves with general quilty goodness.


Here's one of the heron quilts I mention.  This one is an in-progress quilt hanging on my design wall. I'm falling more and more in love with using silk organza in my art quilts.


Instagram gets a mention.  I hang out there as madquiltlady and post frequently (I try and make it everyday) with the hashtag #dyealittleeveryday to show my dyeing projects.  Above is a linen wrap I just finished and hung on the wall in the gallery.  Linen is so lovely to work with.


My embroidery skills, or lack thereof, are discussed.  I've made a couple of little hanging pieces to show my hand dyed threads.  This is the bird silhouette I talk about, I'm not sure the variegation works with the filling in - or maybe I just need more practice with how to work it.

And last, but not least, here's a poster advertising the upcoming Auckland Festival of Quilts.  Can't wait!


Download this episode (right click and save)